Salt intro
This is a report for the Configuration Management Systems course taught by Tero Karvinen
Date: 31-10-2020
To start working with salt i had to install it first. I ran into some issues because salt wasnt in the apt packages for Ubuntu 20.04. This issue was easily solved by looking at the documentation and following the instructions. Documentation: https://repo.saltstack.com/#ubuntu
Note that the second command has to be run as the root user. As seen in the documentation the commands to add salt to apt are:
wget -O - https://repo.saltstack.com/py3/ubuntu/20.04/amd64/latest/SALTSTACK-GPG-KEY.pub | sudo apt-key add -
echo 'deb http://repo.saltstack.com/py3/ubuntu/20.04/amd64/latest focal main' > /etc/apt/sources.list.d/saltstack.list
Now i just had to update my machine and install salt-master.
sudo apt update -y && sudo apt upgrade -y
sudo apt install salt-master
To verify that salt-master is running i ran the following command:
systemctl status salt-master
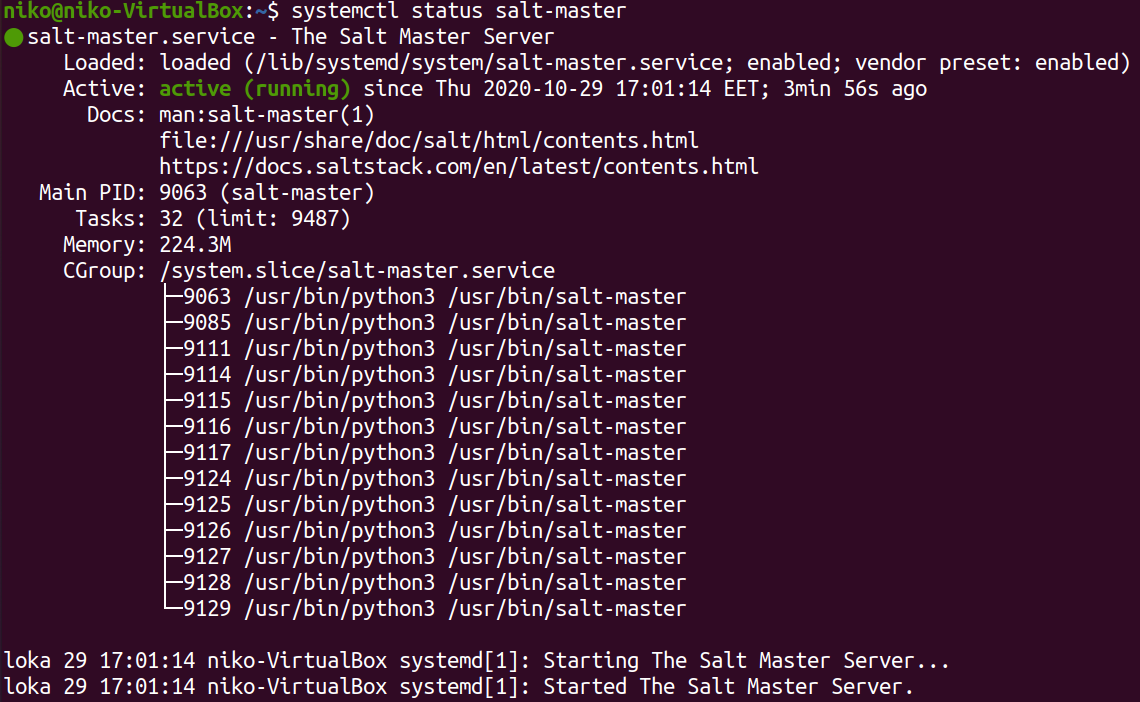
I initially didnt notice i had a firewall enabled so my slave wasnt connecting to the master. After noticing this i added the salt ports (4505 and 4506) to the allowed ports in my firewall.
sudo ufw status
sudo ufw allow 4505
sudo ufw allow 4506
sudo ufw enable
sudo ufw status
To create a minion i downloaded vagrant from over here https://www.vagrantup.com/downloads and with these commands (in PowerShell) i started a new Ubuntu 18.04 machine:
vagrant init bento/ubuntu-18.04
vagrant up
To connect to this new machine i used:
vagrant ssh
On the slave machine i ran updates and installed salt-minion
sudo apt update
sudo apt install salt-minion
Again i verified that the service is running with systemctl
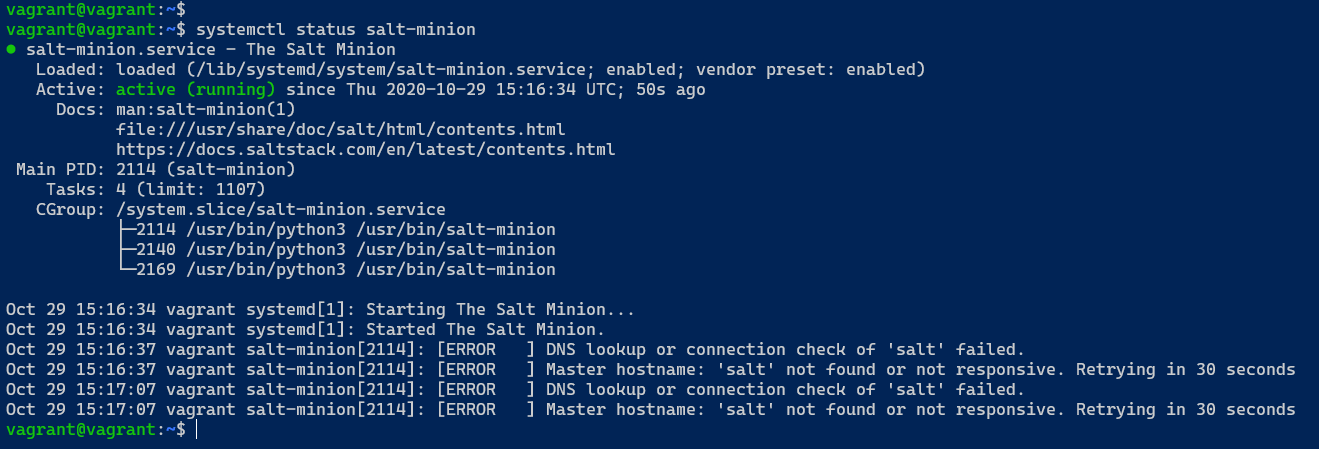
Now to configure a master i edited the configuration file in /etc/salt/minion with "sudoedit" to add the master and an id:
sudoedit /etc/salt/minion
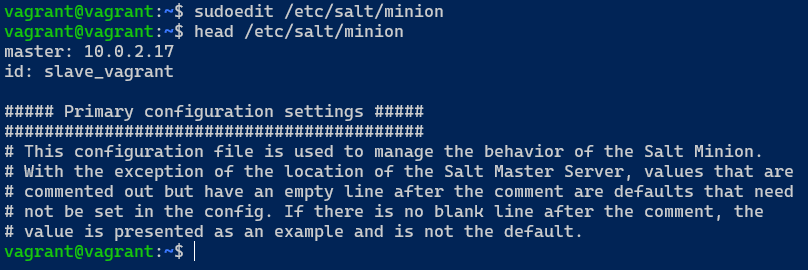
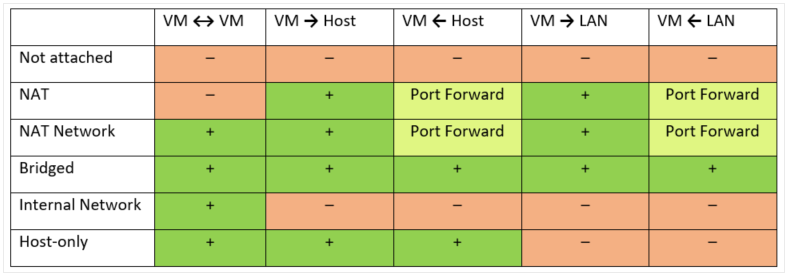
At this point my slave wasnt connecting to the master so i noticed that vagrant set its network adapter to NAT while my master was on its own NAT Network. I could have probably put the slave on the same network relatively easily but for now i honestly just didnt feel like restarting any machines so i just put my master on the same network as the slave.
At this point i relearned why i was using the NAT Network mode in the first place (so VMs can communicate to each other). For the machines to communicate to each other i thought i have to put them on my NAT Network but after a while of reading some documentation it seems like my only options to vagrant were NAT and Host-Only Network. I looked at some more documentation and noticed that on the Host-Only network the VMs can communicate to each other.
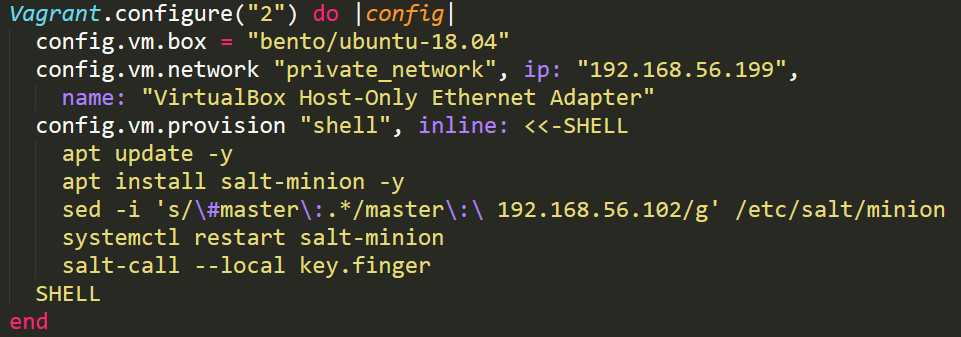
To have vagrant create a machine that connects to the Host-Only Network i had to create a Vagrantfile with the following content:

To use this file i ran “vagrant up” in the directory where the file was located.
Creating a VM based off this file will make a Ubuntu 18.04 machine and put it on Host-Only and give it a static ip (because i ran into some errors using dhcp). Initially i used 10.0.2.69 as the ip but with that i could ping the master but couldnt connect to the 4505 and 4506 port so i looked at the masters ip (198.168.56.102) and assumed they should be in the same address space so it worked with 192.168.56.199 as the slave ip. The only issue i have at the moment is that my master doesnt have internet connection but i can fix that when i shut it down by adding a network adapter with NAT mode to it. Now i just had to redo everything i had done to the slave and use the new master ip.
To recap i have Ubuntu 20.04 with Host-Only Network adapter as the master and the slave i have created with the vagrant file so that it has Host-Only Network adapter (and NAT) with a static ip within the same space as the masters ip.
Some sources i used to get the master and slave to communicate to each other: https://www.nakivo.com/blog/virtualbox-network-setting-guide/ https://app.vagrantup.com/bento/boxes/ubuntu-18.04 https://www.vagrantup.com/docs/providers/virtualbox/networking https://medium.com/@JohnFoderaro/how-to-set-up-a-local-linux-environment-with-vagrant-163f0ba4da77
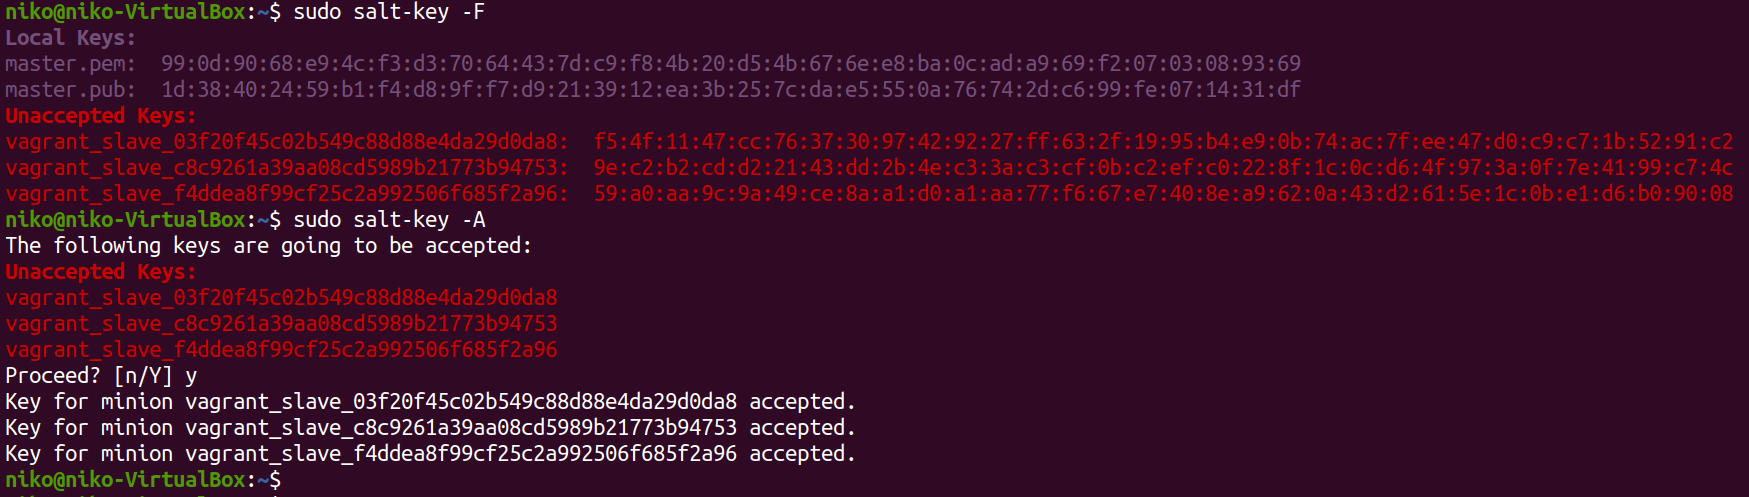
After all this the slave finally communicates to the master. Running the command seen in the image below i can see the fingerprint of the slave

To verify this fingerprint the following command can be run on the slave:
sudo salt-call --local key.finger

I learned this for this book: https://www.packtpub.com/product/learning-saltstack-second-edition/9781785881909
This key can be accepted with the following command:
sudo salt-key -A
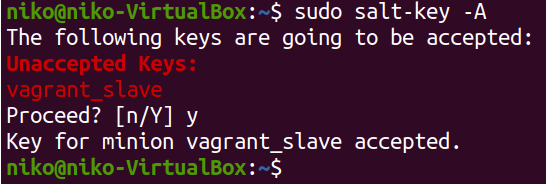
Note that this command accepts all pending keys. An individual key can be accepted with the following command:
sudo salt-key -a slave_name
I also verified the connection by running a command on the slave

Now to create a salt state i followed these instructions: http://terokarvinen.com/2018/salt-states-i-want-my-computers-like-this/
First i created the directory for the sls file with:
sudo mkdir -p /srv/salt/hello
Then i created a salt state and a file to copy to the slave with:
sudoedit /srv/salt/hello/hello.sls
sudoedit /srv/salt/hello/hello.txt
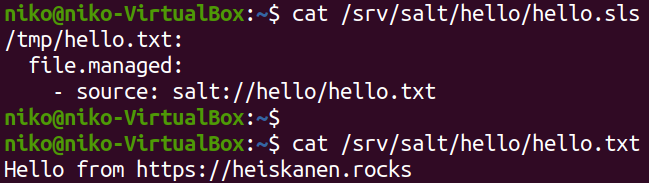
In the sls file i created a state that uses the file.managed module to copy a file to the slaves tmp directory.
Initially i tried applying my state like this:
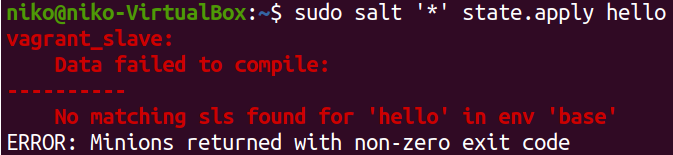
But figured out that because i put it in a subdirectory i need to specify it in the command like this:
sudo salt '*' state.apply hello.hello
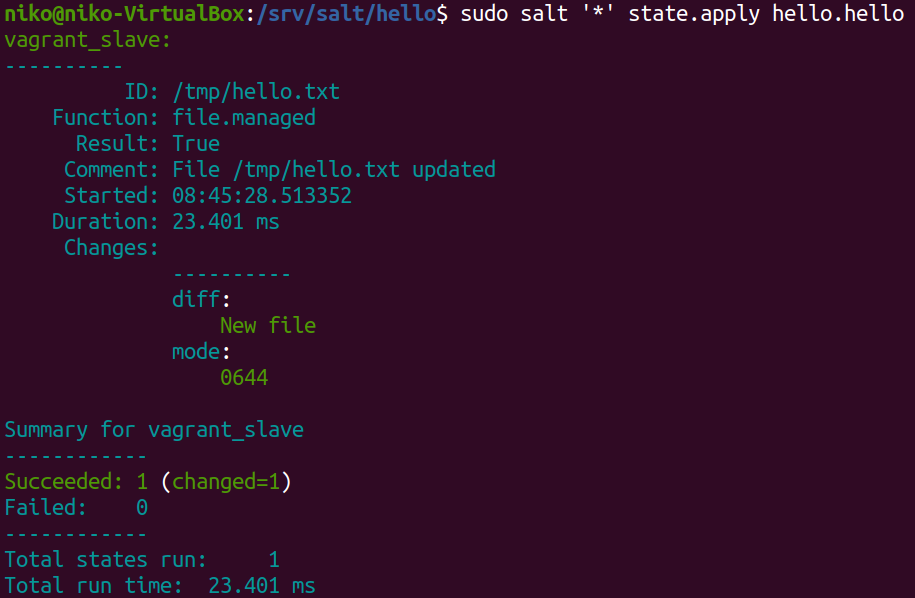
This might look a little weird but the first "hello" is the name of the subdirectory in /srv/salt and the second one is the name of the sls file.
I then verified that this worked by making sure the file exists on the slave.

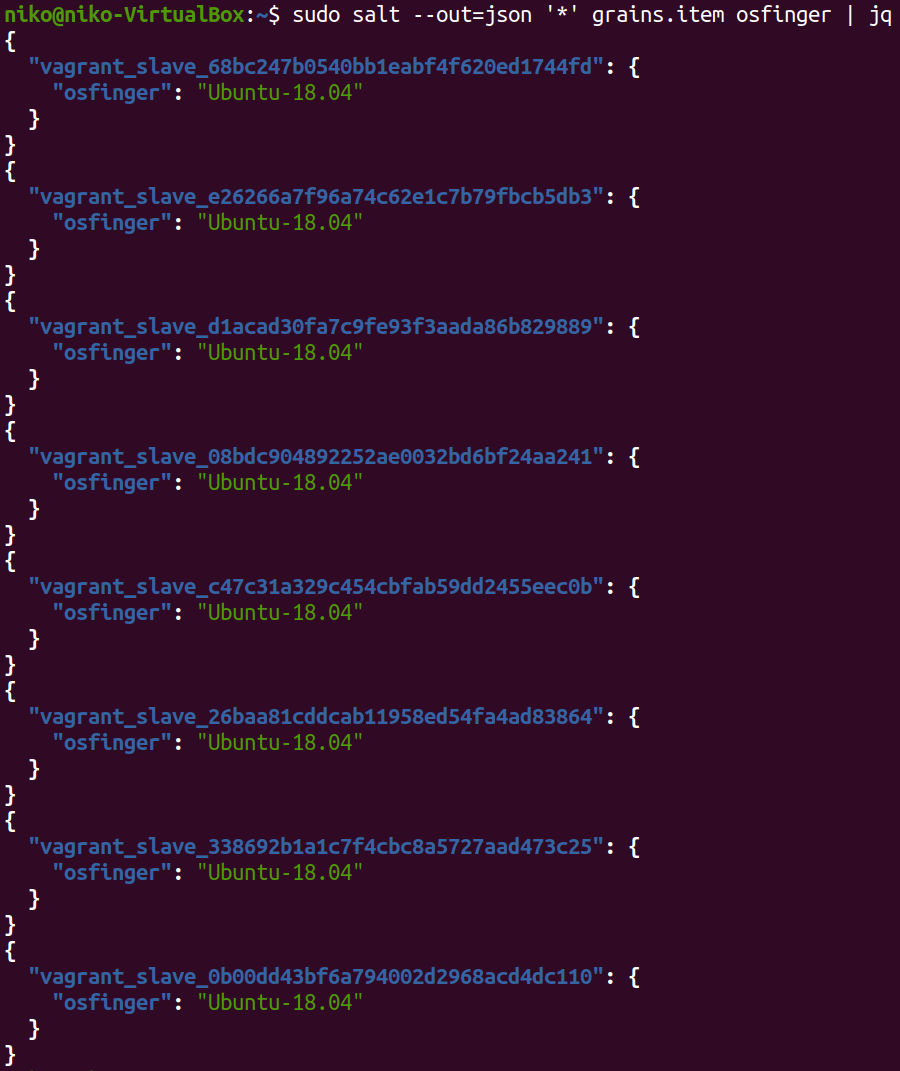
Now to collect some of that sweet data from the slave i ran the following command:
sudo salt '*' grains.items | less
There i looked for some interesting items and used the following command to gather more specific data:
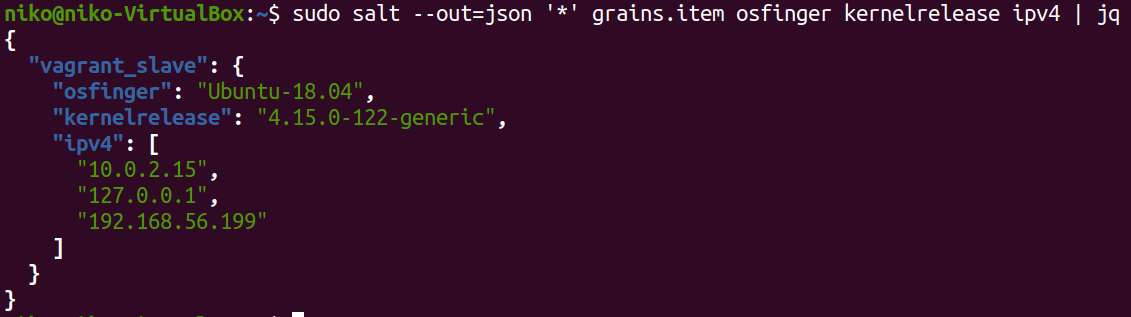
sudo salt --out=json '*' grains.item osfinger kernelrelease ipv4 | jq
As seen in the command i used json as the output format and piped it over to jq to get the nice colors.
Source: http://terokarvinen.com/2018/salt-quickstart-salt-stack-master-and-slave-on-ubuntu-linux/
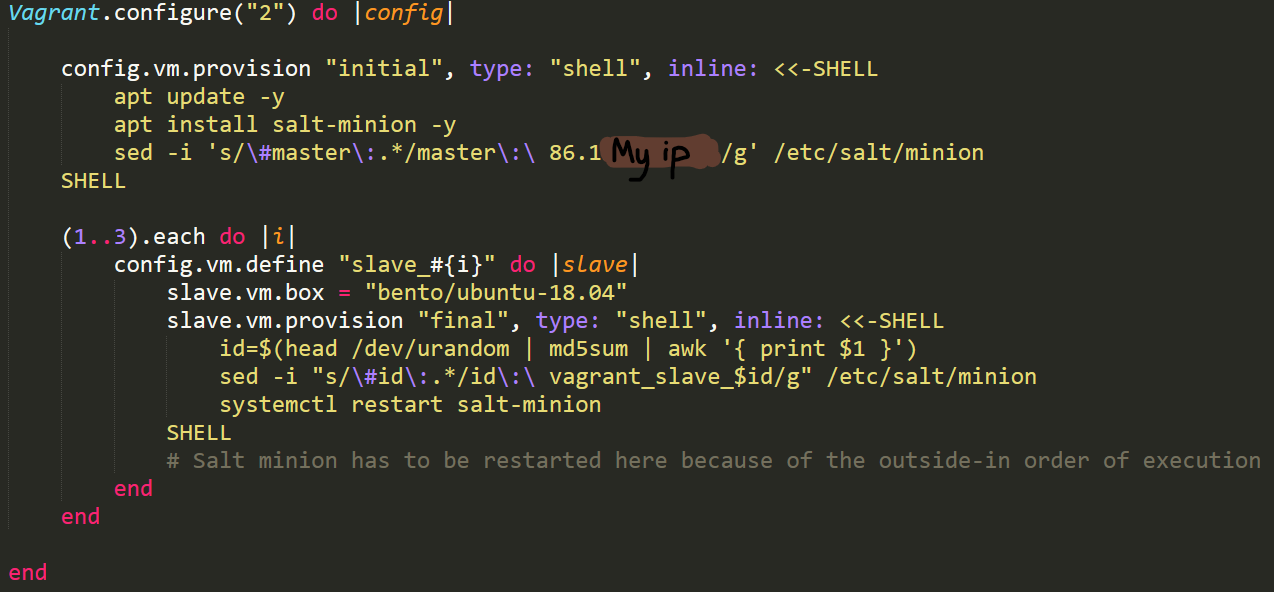
Before i moved on i wanted to create more slaves because using all this just for one slave is a bit overkill. I looked at some documentation and created this vagrant file:
This will configure the new vagrant vm automatically so i dont have to touch it but it still creates only one machine. While i was tinkering with this i decided to fix this networking as well. I wanted to make my master server visible from the outside world and i didnt want to deal with the Host-Only adapter on my slaves. I set my (master) Ubuntu VM to use my NAT Network and forwarded the salt ports to my public ip in virtualbox.

Now all the slaves can just connect to my public ip to get instructions. I verified that this was working by running the following commands on my webserver (in germany):
nc -vz MY_IP_HERE 4505
nc -vz MY_IP_HERE 4506
To make vagrant startup multiple machines i looked at some more documentation. Not gonna lie this took a while to automate nicely but i eventually succeeded. I stubbornly wanted to do this in a for loop in the vagrant file and had some issues giving each machine a diffrent minion id. I didnt manage to get the variables in the vagrant file to work so decided to just give each machine a random md5 hash (for now) at the end of the name. The last thing that gave me issues was the fact that i was restarting salt-minion in the wrong place. Apparently the commands in the vagrant file are excecuted from the outside first working inwards. I moved my restart command inside the commands in the loop and eventually it all worked out. Note that i changed the master ip to my public ip.
Sources:
https://www.vagrantup.com/docs/multi-machine
https://www.vagrantup.com/docs/vagrantfile/tips
https://www.vagrantup.com/docs/provisioning/shell.html
https://groups.google.com/g/vagrant-up/c/EUON-Jh2ASA
I didnt find a built-in way of running a command on each vagrant vm so i decided to just do some PowerShell magic. The following command will work as a for loop that runs a command on each of my (3) vagrant VMs
1..3 | ForEach-Object { vagrant ssh -c 'sudo salt-call --local key.finger' slave_$_ }
Sources:
https://docs.microsoft.com/en-us/powershell/module/microsoft.powershell.core/foreach-object?view=powershell-7
https://www.calebwoods.com/2015/05/05/vagrant-guest-commands/
This command came in very handy when troubleshooting the vagrant machines but now i can use it to look at the fingerprint of all the slaves and verify that they match with the ones im seeing on the master then accept them all.

Now i have a working vagrant file that creates any amout of virtual machines that i want and configures them as slaves to my master so i can jump straight to configuring them with salt.
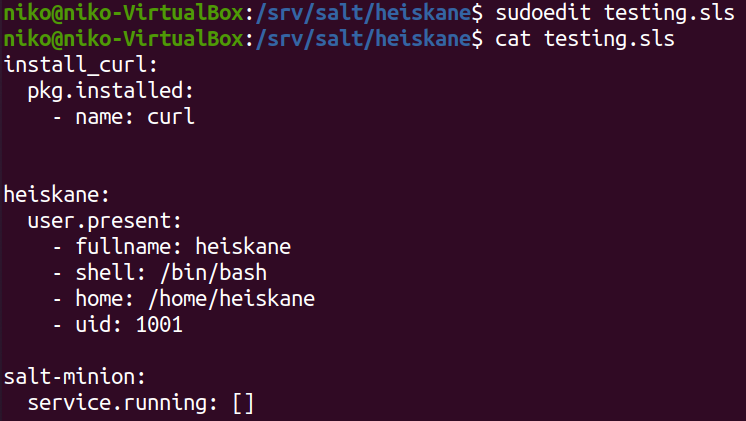
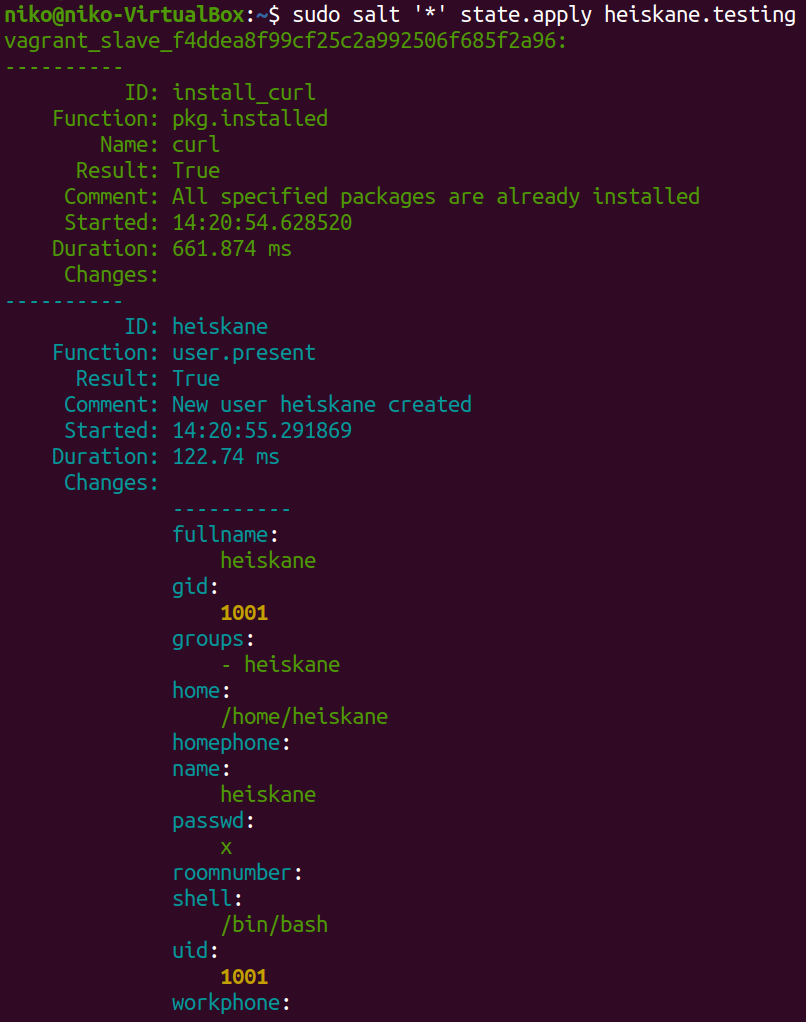
Finally to try some other state functions i created a new subfolder (called heiskane) in /srv/salt and added a file called "testing.sls". In there i added states to make sure curl is installed, add a user and make sure salt-minion is running (which will obviously be always true but im just testing). I applied this state with the following command:
sudo salt '*' state.apply heiskane.testing
Sources:
https://docs.saltstack.com/en/latest/ref/states/all/salt.states.user.html
https://docs.saltstack.com/en/latest/ref/states/all/salt.states.service.html
In the end i did also try running 8 machines with vagrant and everything was working smoothly without issues. All i had to do was to set my loop in the vagrant file to go up to 8 and run "vagrant up" in the same directory as the file. A moment later i had 8 slaves connecting to my master.