SaltStack Samba
This is a report for the Configuration Management Systems course taught by Tero Karvinen
Date: 07-11-2020
This week the i wanted to configure my own smb server so i could have a place to put backups. For initial testing i used vagrant to create machines that i could safely experiment on. Vagrant is a handy tool to create machines with (in my case) virtualbox so i can create new machines fast and destroy then when im done. Later i got myself a publicly accessible server from linode to host an actual smb server that im going to use for some backups.
I started simple and created a couple of new slave machines with vagrant. I improved my Vagrant file sligthly from the last time. Now its more organized with the scripts i want to run as their own variables and the machines are on the same network this time. The id for the slaves is no longer based on a hash because i learned that by default the hostname of the machine is used so im putting the "i" variable in the for-loop at the end of the slave machines hostname now. Do note that i am working with ubuntu 18.04 machines here.
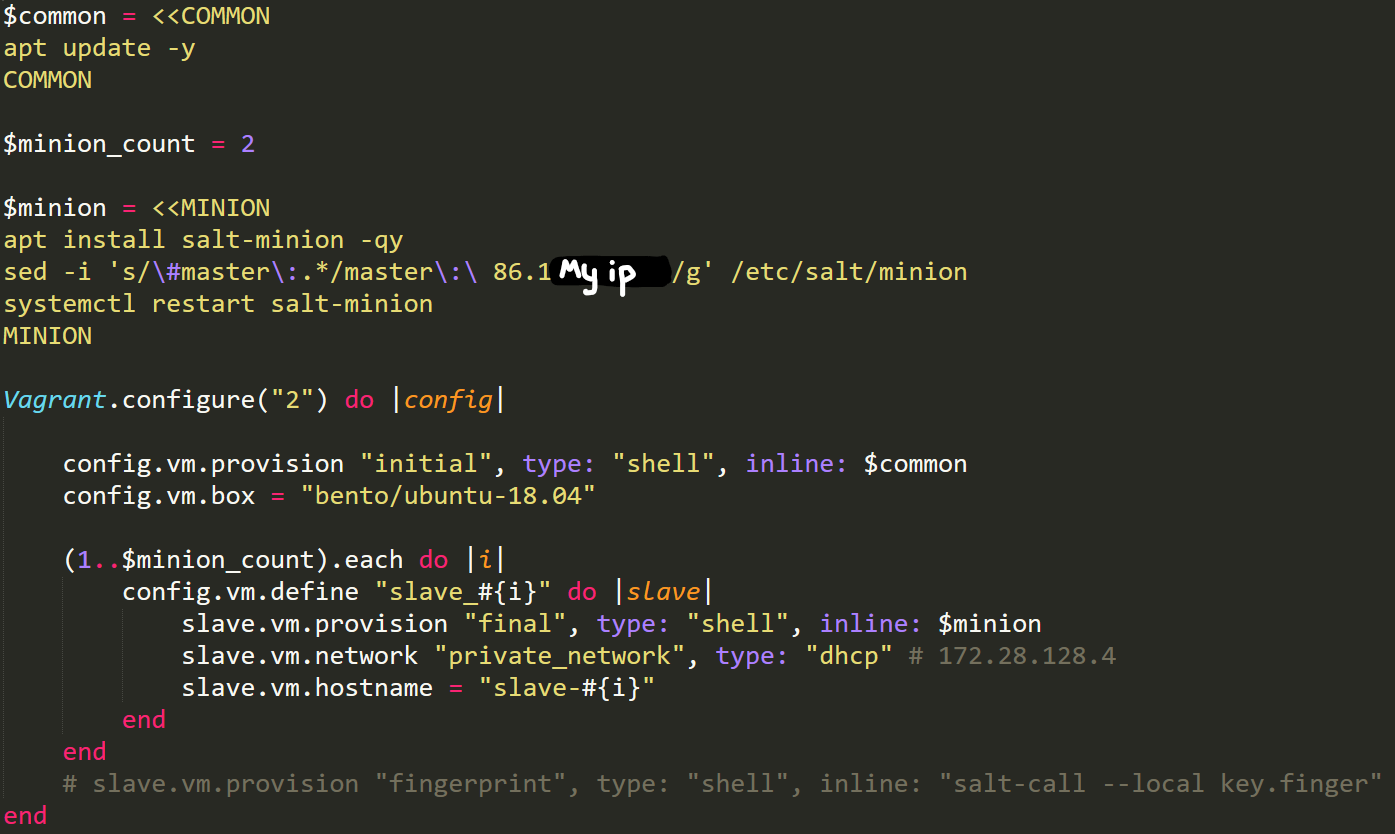
Source:
http://terokarvinen.com/2018/automatically-provision-vagrant-virtualmachines-as-salt-slaves/
With my test machines up and running the first step was to configure samba manually to ensure that i know what im doing. I partly followed a tutorial from digitalocean.
https://www.digitalocean.com/community/tutorials/how-to-set-up-a-samba-share-for-a-small-organization-on-ubuntu-16-04
Ill keep this part short because there was nothing too exciting here. I started by installing samba
sudo apt install samba
I added a user wih no shell and added it to the sambashare group
sudo useradd -m -s /usr/sbin/nologin -G sambashare tweedledum
I set an smb password for the user then made a directory to use as the samba share and set the correct permissions to it
sudo smbpasswd -a tweedledum
sudo -u tweedledumb mkdir /home/tweedledum/smb_share
sudo chown :sambashare /home/tweedledum/smb_share
sudo chmod 770 /home/tweedledum/smb_share
To configure samba i wanted to first copy the configuration file to my master server so i can use it later when i will automate all of this. There is probably/hopefully a better way to do this but i just ran a command from my master on the minion to read the smb.conf file then base64 encode it so i can copy paste is to a base64 decode command like this:
sudo salt 'slave-1' cmd.run 'cat /etc/samba/smb.conf |base64 -w 0'
echo -n ‘BASE64_HERE’ | base64 -d > smb.conf
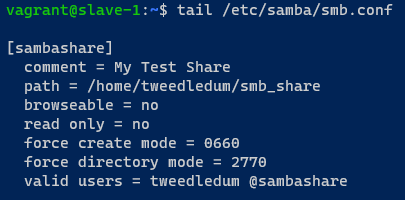
I added this part at the end of the smb.conf file to create a new share called “sambashare” then configure the location of the share and the valid users for it. The "browseable" option determines whether unauthenticated users can see the share and the "read only" is kinda self-explanatory
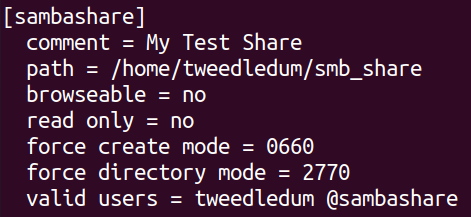
After the configurations i restarted samba
sudo systemctl restart smbd
To test that everything is working i installed smbclient on another machine and connected to the share with the following commands
sudo apt install smbclient
smbclient -U tweedledum //172.28.128.32/sambashare

Note that before moving on i destroyed my vagrant machines and re-created them to start the automation part from scratch
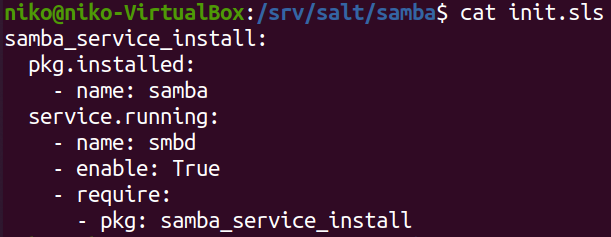
Now with the manual configuration out of the way i did some googling and created the following sls file in /srv/salt/samba directory:
Sources:
https://github.com/saltstack-formulas/samba-formula/blob/master/samba/server/init.sls
https://linuxize.com/post/how-to-install-and-configure-samba-on-ubuntu-18-04/
https://docs.saltstack.com/en/master/ref/states/requisites.html
This sls file will apt install samba and make sure that it is running. Note that the “samba_service_install” state is required so it will only check if samba is running if the installation was successfull. Running this state with the following command was successful:
sudo salt 'slave-2' state.apply samba
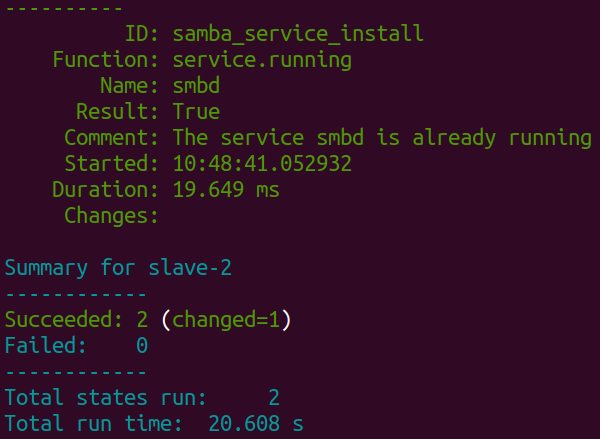
Note that the name of the slave might change in some places as i am experimenting with multiple machines and might re-install them at some point.
Next i wanted to create a user that would be able to access the smb share. For this i mainly used my previous homework as a refrence.
In the sls file i created a new function (or whatever its called) to make a new user with the name of tweedledum, no shell, a home directory and made him part of the sambashare group.
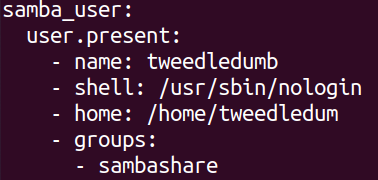
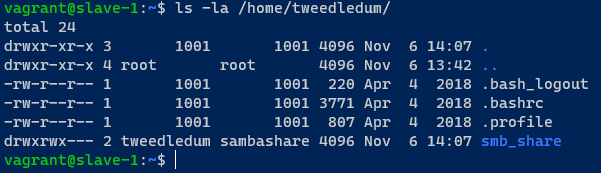
Applying the state was successful so i went ahead and verified this locally on the target machine with the commands seen in the image.

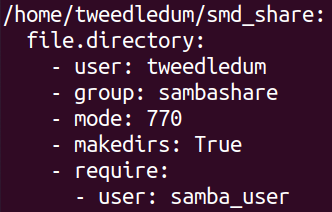
With the user created i made a state to make a directory in the tweedledums home.
Source:
https://docs.saltstack.com/en/latest/ref/states/all/salt.states.file.html
This will create a directory in tweedledums home and set the appropriate permissions on it. Note that this requires the state i previously created so this should only run if the tweedledum user actually exists. Applying this state was successful so i went over to verify this locally again.
At this point i wanted to add the smb.conf file that i created earlier so i looked at my previous homework again and created a similar configuration. This time i just added a requirement just like i did earlier with the samba_service_install state. A tip for figuring out the syntax would be to look at the module you want to require. The "samba_service_install" uses the "pkg.installed" so im requiring "- pkg" here. When ill later want to require this part i will use "- file" instead because im using "file.managed" here.
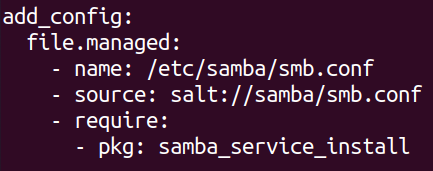
As usual after applying the state without issues i verified that the file was transfered.
Finally it was time to set the smb password for the user. I expected this part to be much more difficult to accomplish than it was. I found the pbedit module that let me add an smb password and that was about it. I guess one thing here is important to note and that is the fact that the password must be given as an NT hash despite it seeming like it isnt necessary if the "password_hashed" is set to false. Unfortunately i forgot to take screenshots of the error messages but using the actual hash is the correct way go to about it anyway so its not much of an issue. I used an online tool to get an NT hash but for a real password i would recommend creating the hash with a local tool. I will look into using something called pillar later. I assume that the pillar is similar to ansibles vault where the sensitive data is stored in an encrypted file.

Source:
https://docs.saltstack.com/en/latest/ref/states/all/salt.states.pdbedit.html
https://www.browserling.com/tools/ntlm-hash
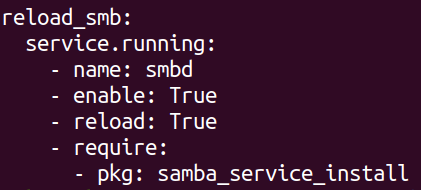
Lastly it was time reload smb service for all the configuration to take effect. Im not sure if this makes checking if the service is running in the beginning redundant but ill leave it in there for now. I applied the state wihtout any issues.
I logged in a diffrent machine on the network ran the smbclient command again. To my surprise it just worked.

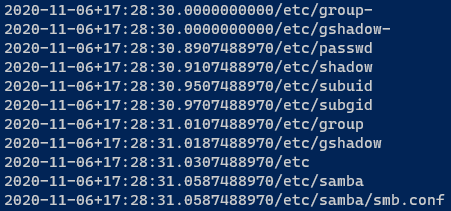
As a sanity check i ran the same state for the other machine and the whole process ran without any errors or issues. I verified again that everything worked and ran the following command to see the most recently modified files in /etc:
find /etc -printf '%T+%p\n'|sort
I will leave the full .sls file, smb.conf file and the full output of the application of this state on the fresh machine here.
init.slssmb.conf
Samba state application
As a quick tip i used xclip to copy the contents of the big files which basically lets you take standard output and throw it into the clipboard. I learned this trick from watching way too many ippsec videos
cat smb.conf |xclip -selection clipboard
At this point i tried to apply this state to a ubuntu 20.04 machine and the only problem i had was salt-minion wasnt in the apt repository. I just had to add this script to my vagrant file:
$ubuntu20 = <<SHELL
wget -O - https://repo.saltstack.com/py3/ubuntu/20.04/amd64/latest/SALTSTACK-GPG-KEY.pub | sudo apt-key add -
echo 'deb http://repo.saltstack.com/py3/ubuntu/20.04/amd64/latest focal main' > /etc/apt/sources.list.d/saltstack.list
apt update -y
SHELL
Now i finally wanted to actually use what i have learned and setup my own smb server to use for some backups. I already have my webserver from linode and ive been happy with it so im going to use it for my samba server as well. Because my experimentation with Ubuntu 20.04 was successful i chose it for my server. I set the server in Germany and took the option with 50gb of storage. This might not sound like much but for keeping backups of my schoolwork and code its more than enough because im mostly dealing with text files. I also enabled the backups on the server just in case something goes horribly wrong. This will take daily and weekly backups of my server.

With the server created i copied over my ssh key and logged in
ssh-copy-id -i .ssh/id_ecdsa.pub root@SERVER_IP_HERE
ssh root@SERVER_IP_HERE
I ran the commands i previously had vagrant do for me to get salt-minion installed and master ip set up.
wget -O - https://repo.saltstack.com/py3/ubuntu/20.04/amd64/latest/SALTSTACK-GPG-KEY.pub | sudo apt-key add -
echo 'deb http://repo.saltstack.com/py3/ubuntu/20.04/amd64/latest focal main' > /etc/apt/sources.list.d/saltstack.list
apt update -y
Before i applied my state i made some changes to my sls and conf files. I changed the username and set a proper password as well. To create an NT hash this time i used the following command:
iconv -f ASCII -t UTF-16LE <(printf "NotActuallyMyPassword") | openssl dgst -md4
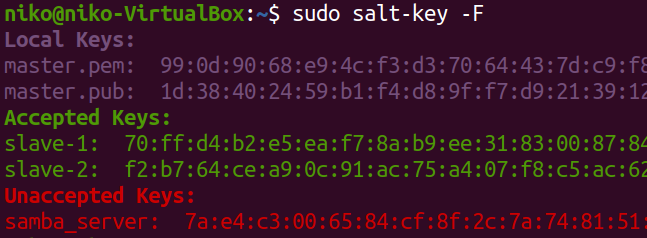
I also changed the samba share location and the valid users in the smb configuration file at this point. With that out of the way i acceped my servers key with the following command:
sudo salt-key -a samba_server
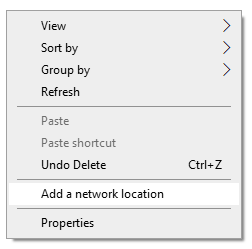
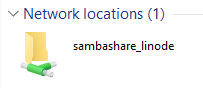
Applying the state to the server ran without any issues as expected after which i went to "This PC" on my windows machine and right-clicked to add a network location. There i added my server address like this:
"\\SERVER_IP\sambashare"
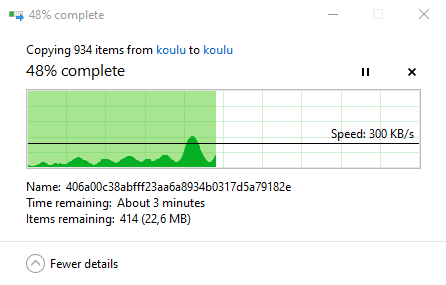
Now i have a remote server for backups with periodic backups on that server as well thanks to linodes backup service. This certanly makes my data much safer than it was so i can apply windows updates without having to fear that microsoft will break something.
The transfer speeds were certainly not impressive but again im mostly going to be uploading text files full of notes and/or code so it works just fine.
The last thing i wanted to do was disable password login for ssh. I could have done this with salt as well but i wanted to get this out of the way as soon as possible so i manually edited /etc/ssh/sshd_config and set these lines after which i restarted the ssh daemon
PasswordAuthentication no
ChallengeResponseAuthentication no
UsePAM no
systemctl restart sshd
Realistically i might not even need to be able to ssh in but i want to keep my options open just in case. One other thing i might want to do later is create a user that i would use to login to the server instead of just using the root user.
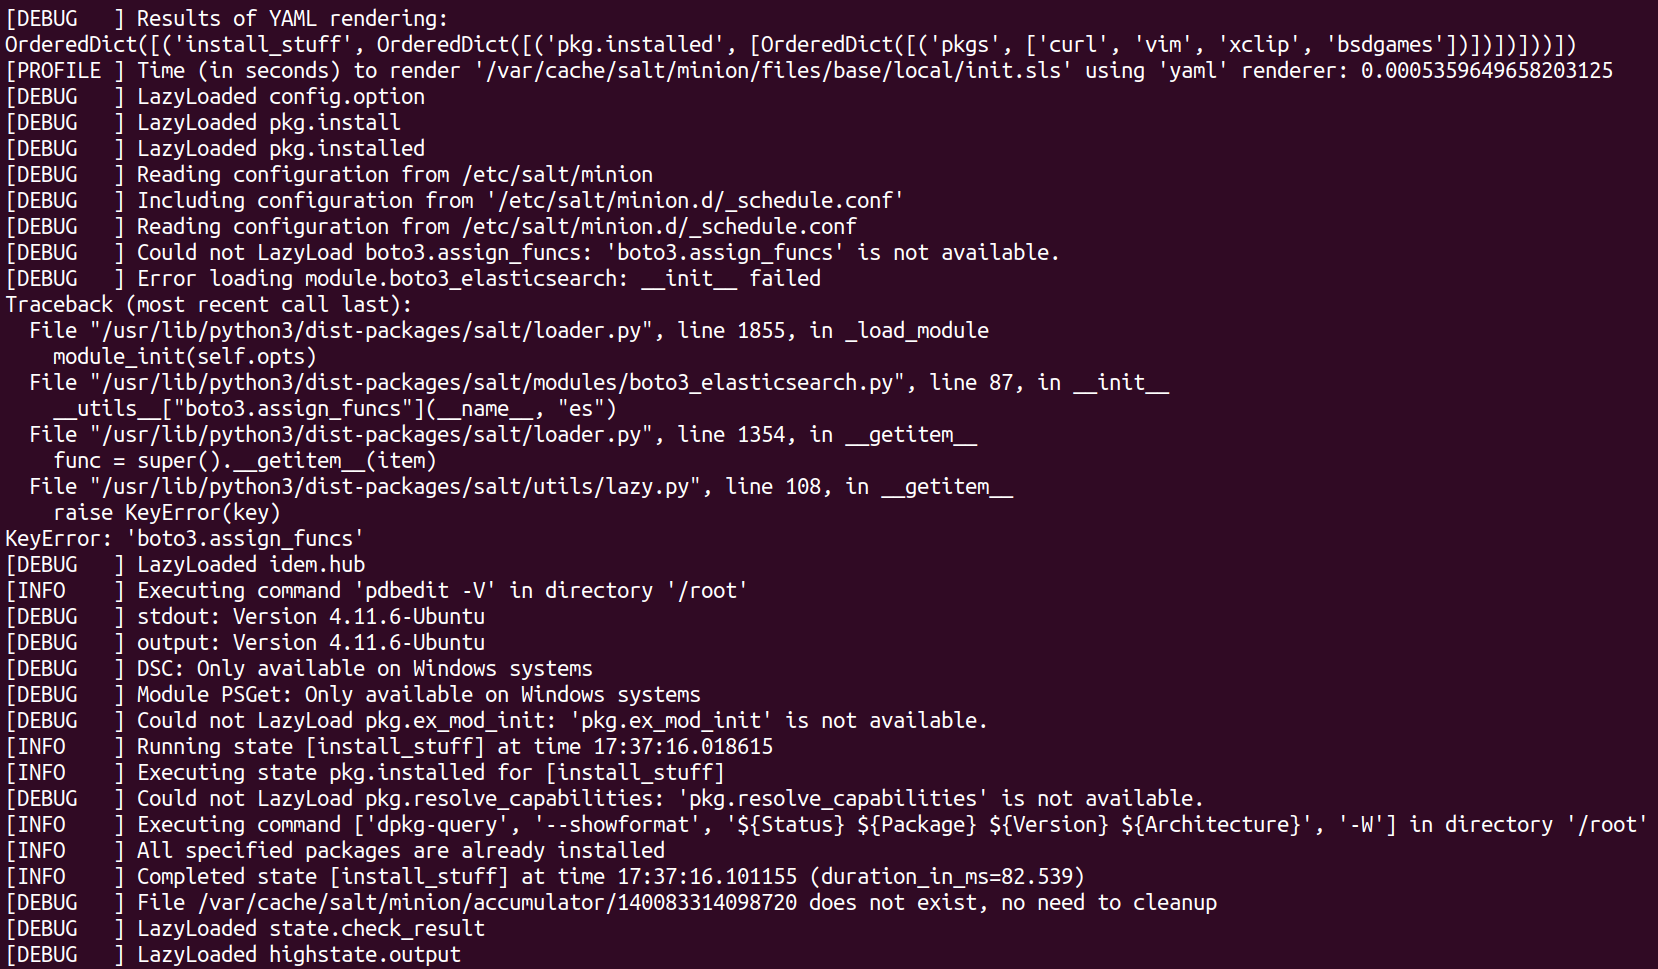
Last thing to do this week was to apply a state locally with the debug option on and examine the output. I didnt want to install a samba server on my salt-master so i created a simple state that makes sure that a few packages are installed.

Running the state gave lots of output but not much of interest besides some errors trying to load some kind of elasticsearch module and python list of the packages to install.
sudo salt-call --local state.apply local -l debug